
Floor Marking Tape Guide: Your Ultimate Tool for 5S Tape Success
Floor marking is one of the most common tools used to quickly and efficiently convey information to people in a space.
From warehouses to high tech factories, the ease of using simple lines and grids to direct foot traffic or show where items should rest is a simple organizational tool.
5S-style floor marking conveys information in a quick and efficient way that works to open up space while making the work area more user-friendly.
The 5S Store has worked with hundreds of facilities to design and implement their 5S floor marking programs. In this guide, we will share everything you need to know to create your plan and install tape in your facility. And, we’ve created a handy checklist to help you on your journey.
In this guide, we will cover the entire taping process, from where floor taping falls in the 5S process to troubleshooting.
Common Applications
Color Guidelines
Choose the Right Tape
Take The Tape Selection Quiz
Troubleshooting Taping Problems
Where tape falls in the 5S process
Floor and aisle taping programs help to improve efficiency and fall within the Set In Order phase. Although there’s a lot to be implemented in Standardize related to floor marking, as well.
(Asking yourself what 5S is and how it can help you? Learn more about it here.)
Common Applications
5S Floor Marking Options
 |  |  |  |
We’ve seen floor tape used in many creative ways, but these are the most common. Which areas represent an opportunity for your facility?
Storage Indicators for Product and Materials
We find this strategy saves huge amounts of time, energy and hassle.
Use floor marking tape or corner markers to show where pallets filled with product or materials are meant to be placed. This particular application is easily used for both long term storage and short term project. Make sure to choose the appropriate type of tape (or corners) accordingly, by reading about the types of tape below.
Equipment and Tool Storage
Just like in the storage use-case above, utilizing tape to outline where equipment and large tools should be placed helps ensure everything has a “home” in your facility.
Another important benefit of outline equipment is to help new operators understand how much space is needed to operate the equipment safely. The lines literally create an imprint in the mind of the worker.
Communicating with Employees
Use tape and other floor-adhering visual messaging tools to remind workers about what to avoid, where certain activities are allowed/not allowed (such as smoking), or wherever information that requires constant reminders needs to be displayed.
Aisle Marking Traffic Routes
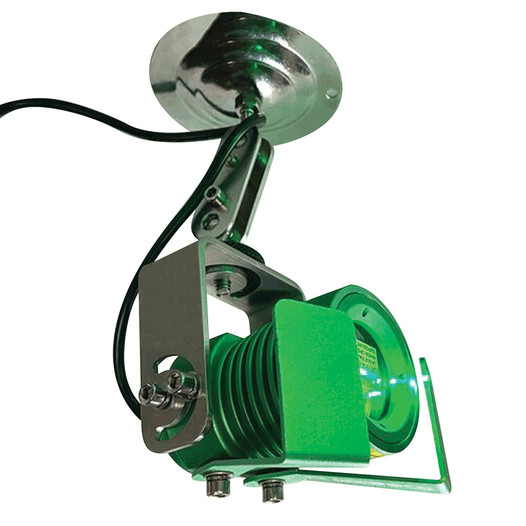
Even if you’ve never set foot on a manufacturing floor, you’ve probably seen aisle marking to distinguish traffic routes. Gyms, schools, and other high-traffic facilities use them all the time to direct traffic. On work floors, this type of marking avoids hazards such as collisions between workers and machinery. In areas where floor tape won’t work, line projectors can be a good solution.
In addition to regularly followed paths, using special aisle marking tape to mark emergency exits, footprints, and other elements to clearly mark emergency routes allows anyone to get in and out of your facility in an emergency safely with no training.
Hazardous Areas
Alert employees visually of any possible dangerous areas by utilizing caution tape or specialty decals like door swing floor signs in front of and around the area. Consider marking any areas that contain chemicals, electrical, potentially hazardous equipment, or tripping hazards carefully and fully (Read on to learn how improper hazard marking violates OSHA standards).
Improving Safety with Floor Marking Guidelines
Using floor marking in your facility will help to make your workers safer. This is why there are several OSHA standards around this topic. Even when regulations do not require it, floor marking is a relatively inexpensive complement to your safety program.
Due to regulatory requirements and long-held best practices, it’s likely that you’ve already deployed some floor taping and/or aisle marking to help with safety. However, before you scroll past this section, thinking you’re all set, check to see if you are taking full advantage of these common safety optimizations that not all facilities are yet utilizing. These are:
- Glow-in-the-dark markers for emergency exits and power outages
- “Keep Area Clear” Signs
- Markings that stand out effectively for mechanical, environmental, and noise hazards
- LED floor sign projectors for areas where tape or decals are impractical
- Floor line laser projectors are another option to indicate aisles and lanes
There are many cases where floor marking lines are required to meet OSHA standards. Such as:
- Tripping Hazards – The most common floor marking-related violation, make sure these areas are clearly marked.
- Walking/Work Surface Violations – This happens when employees’ movement paths (such as walkways) are not clearly identified.
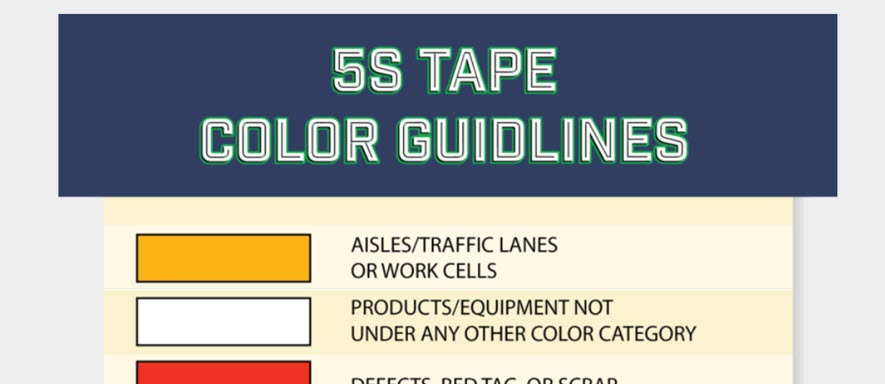
Taping Color Guidelines
Color coding for 5S use and for OSHA standards is important to make sure training is simple and everyone understands what the colors stand for. While a specific type of color-coding isn’t required by law, the recommended coding is shown in the chart below.
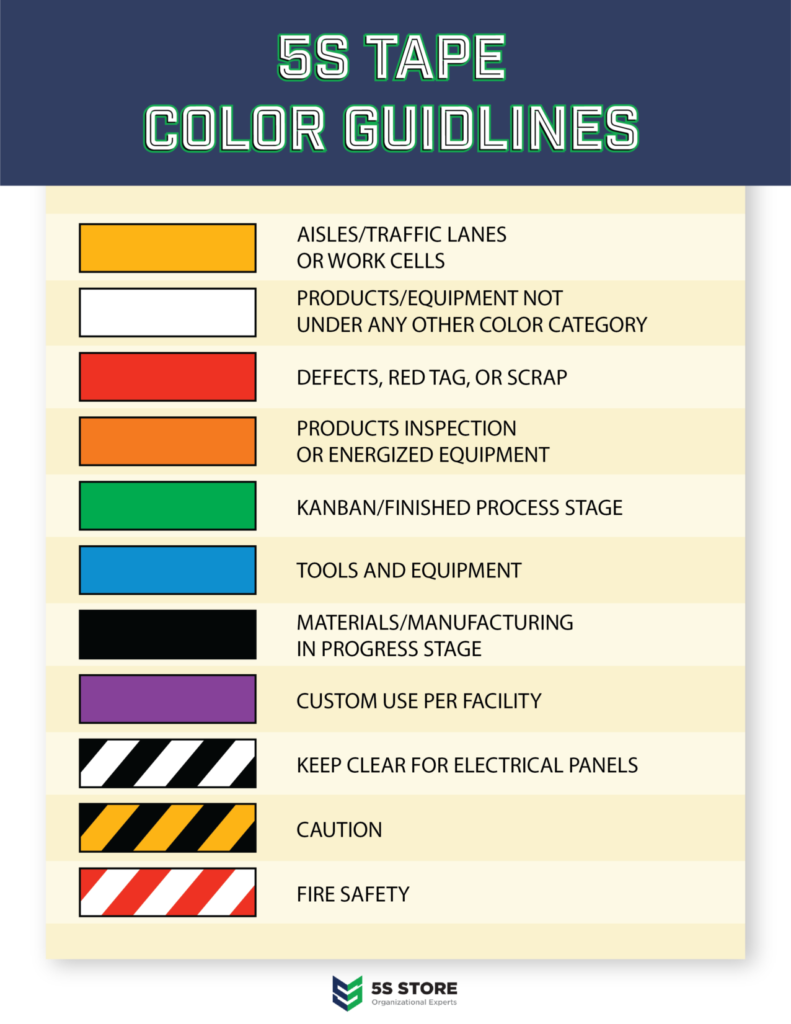
Whatever color-coding you choose to use, it’s essential to post a color guide in locations where everyone will notice them. Consider posting your color coding grid in your breakroom, next to time clocks, and at other highly visible points in the facility. A best practice is to include this in your new employee onboarding process too.
Line and Aisle Width Guidelines
OSHA standards require line widths of at least two inches. That means that anything above that will be acceptable to meet the standard. Most tapes are between two and four inches because wider tape than that becomes difficult to set in place.
Aisle widths are a bit trickier, but in general, aisles should be at least 36 inches. OSHA has regulations for aisle width related to combustibles and exit routes. And, specific states sometimes have regulations that go beyond this. If you need help with aisle width decisions, reach out to a professional to guide you.
How to Choose the Right Tape
There are only two reasons that a 5S floor taping solution generally fails. The first is choosing the wrong type of tape for the area’s particular floor type; and, the second is improper installation. Luckily, this part of your 5S program is very simple. Follow the steps below to ensure you set up your tape system properly. Read on and download our checklist to help you through this process. (pdf)
Choosing the Wrong Tape
There are many different types of facility floors. Unfortunately, the floor taping industry hasn’t done a great job of educating you about this nuance of choosing which tape to use. As a result, floor tape can fail. This is very frustrating and often causes people like you to feel like your efforts and budgets were wasted.
The truth is, you can follow all of the right installation tips below (and in our checklist, but if you use the wrong tape for your floor, you’re already setting yourself up to be disappointed.
After years of encountering this problem, our team found that heavy dut floor tape doesn’t always mean “heavy-duty”. It simply means it will hold up to forklifts. Unfortunately, that’s only the case on certain floor types. When you review the types of 5S floor tape below, follow these two rules of thumb for your facility’s type of floor and I guarantee your 5S scores will go up because premature tape failures will be a thing of the past. The two rules are:
- Smooth floors are best suited to viZ-Mark or Tough-Mark tape.
- Porous floors are best suited to Durastripe Supreme V.
You can read about the different types of tape that are common below, and don’t forget these two rules when choosing. Our team has tested over a dozen tape types and we are confident that with these two rules in mind one of the tapes listed below will work perfectly for you.
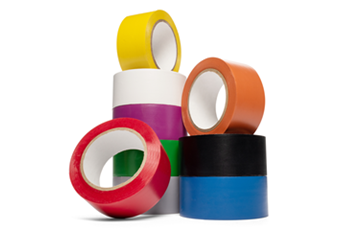
There are several different types of 5S-friendly floor tape that you can choose from. The most common varieties our team recommends are:
Vinyl Floor Marking Tape
Vinyl tape is best for short term 5S implementations. For example, teams often use it while determining the best layout to avoid heavy-duty material handling equipment such as forklifts.
It can be difficult to make a straight line with vinyl floor tape, so use it where straight lines are not overly important. This type of tape is rubber-based, which means it will bend during the installment. With that in mind, it’s important to use a vinyl floor tape applicator for installing long lines.
Best Application for Vinyl Aisle Marking Tape
- Desktops
- Workbenches
- Vinyl Floors
- R&D Areas
- Hallways
- Low traffic areas
Usage Tip:
Clear tape can be placed over the vinyl for added durability (this can give the vinyl a hazy look). Use clear tape that is one inch wider than the solid tape it is

Durastripe Supreme V Tape
Supreme V is an excellent heavy-duty style tape. It is best suited for porous floors in high-forklift traffic areas. No tape will hold up forever against pallet dragging, but Supreme V’s beveled edge and pressure-sensitive adhesive make it quite durable in these instances.
Removal is much easier than vinyl tape or Floor-Mark tape because Supreme V stays in one piece as it is removed.
Best Applications for Durastripe Supreme V Tape
- High-traffic areas such as warehouses and manufacturing floors
viZ-Mark Floor Tape
viZ-Mark Heavy Duty Floor Tape by the 5S Store is an excellent choice for smooth floors in high-forklift traffic areas. Although no tape will hold up forever against pallet dragging, viz-Mark’s beveled edge and
Areas where forklift rear wheels pivot and turn will particularly benefit from viZ-Mark’s smooth surface and extra-durable adhesive. Removal is simple because this tape stays in one piece as it is removed. As with other heavy-duty tapes, a floor scraper is useful.
Best Applications for Viz-Mark Floor Tape
- Highly trafficked areas such as warehouses and manufacturing floors
Tough-Mark™ Floor Strips
Tough-Mark™ floor marking strips are an excellent choice for heavy-duty floor marking scenarios. These strips are best suited for smooth floors where high forklift traffic is likely. Installation of these strips is a breeze, due to the rigid four-foot striped design.
Like other types of heavy-duty tape mentioned in this piece, Tough-Mark™ tape is easier to remove than vinyl or Floor-Mark, because it remains in one piece during removal.
Best Applications for Viz-Mark Floor Tape
- Highly trafficked areas such as warehouses and manufacturing floors
Tape Selection Quiz
Once you know what type of floors you have. It’s simple to choose the right tape. Then, it’s time to learn how to install it properly, because the second reason your tape might fail is due to improper installation.
Click the Icon Below to take our Tape Selection Quiz:
Improper Installation
The most important key to making any floor taping solution last is to install the tape properly. None of the suggested tapes will work as expected if you do not follow the three important steps to installing floor tape below.

Step One: Clean floors well.
Take your time and make sure to clean every part of the floor that the tape will touch until as much dirt, grit, grime, and other buildup is removed as possible. This is simpler than it sounds. Usually, a good sweep and washing are all that is required. Most industrial floor cleaners will work well. We like Durastripe Floor Cleaner for this step. DO NOT use citrus or chlorine cleansers during this process, as these can erode the glue on your tape.
Step Two: Dry the floors.
After cleaning, drying the floors completely is an essential step. Make sure all your newly shined floors are exceptionally dry before attempting to apply your tape.
Step Three: Tamp the tape.
Don’t rely on your feet or hands to tamp down your new tape! Good quality heavy-duty floor tapes are not like the regular tape you use at home or around the office. High-quality tapes are made with pressure-sensitive adhesive, which means they require excessive weight to press them into the floor.
Use excessive weight, such as a landscape roller or rear wheel of a forklift to tamp the tape to the floor. This will help ensure that any air pockets are removed and adhesive sticks properly.
To use a forklift, slowly roll over the tape with the rear wheel. Try to press it in the same direction it was installed in, if possible.
This final step, tamping, will greatly enhance the likelihood of a successful tape installation. Use this same process for other floor adhesive pieces too, such as corner markers or footprints.
Troubleshooting the Most Common Taping Problem
You’ve chosen the right tape, installed it properly, and are pleased with a job well done. It feels great!
Until…a few months later, your 5S scores begin to go down because your tape doesn’t look so shiny and new anymore. It might be moving, fading, or falling apart. If this has happened to you, it’s probably due to pallet dragging. Read on to learn how to solve this common problem and keep your floor tape in great shape for the long term.
Problem: Help! My Tape Doesn’t Last!
Over the years, our team spoke to many people having trouble with long lasting solutions for their floor tape. The most common reason tape fails is dragging pallets.
Note: Dragging pallets violates OSHA forklift driving regulations.
Solution: Stop dragging pallets, no seriously just stop (It’s got to be a standard).
The way to keep pallets from destroying your tape is to retrain forklift drives so they do not drag pallets. Unfortunately, we often hear this:
“We’ve tried to get them to stop dragging, but to no avail.”
Holding people accountable is the only solution to this problem. Don’t believe us? Our founder, David Visco, tells this story:
“A few years ago, I was exhibiting The 5S Store at a manufacturing conference. During a conversation with an attendee complaining about his floor tape and corner markers failing, the issue of dragging pallets came up. He told me over and over that his employees simply wouldn’t listen. Lifting the forklift even a little bit seemed like too much effort.
Another attendee standing close by said something I would never forget: ‘Do you want to know what we did about it? It was easy, we just made it the standard. Everyone was held accountable.’
I’ve told folks that same thing for years, but often only received glazed over looks in return. This passerby provided more proof then all my expertise could give. As is the case with most improvement initiatives, holding people accountable to a standard is essential. Explain. Make it clear. Ensure they know what is expected. Then, hold them accountable to it.”
Still feel like you won’t be able to get your employees to stop dragging pallets? Try this…
Solution: Let the users own the solution, not just the problem.
Another way of holding people accountable that’s often even more effective is to get them involved in the solution, to begin with.
Use your forklift drivers and others responsible for ensuring pallet dragging doesn’t happen as helpers to install the tape. Of course, this is a Lean 101 lesson. When workers own the process and the presentation of their work area, they are more likely to keep to the standards set in place.
Trust us! When an employee spends hours on their hands and knees cleaning up floors and painstakingly installing tape, they won’t want to see it destroyed!
Now that you know what a 5S taping plan looks like, how to choose the right floor tape for your facility, how to install it, and what to do if pallet dragging is giving you headaches, you’re ready to download your free Taping Selection Checklist to make sure you follow these steps to success during your floor tapping project.
Enjoy the process! Your facility is about to be transformed, with clearly marked floor space for the long haul.