Floor Marking Best Practices
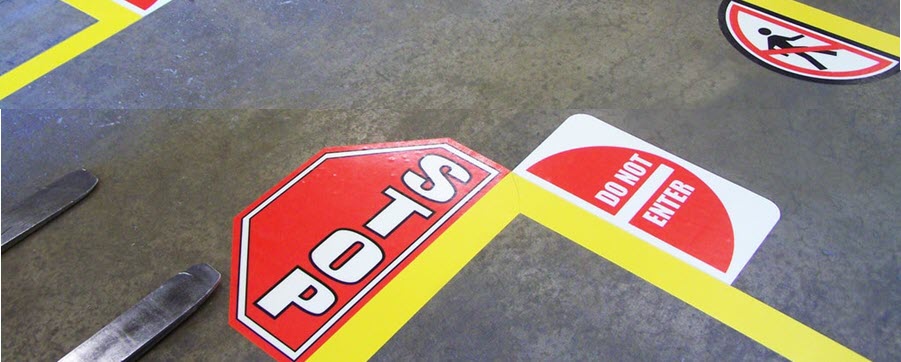
Floor marking is a very commonly-used visual communication tool. From warehouses to high tech factories and even retail stores, the ease of using simple lines and grids to direct foot traffic or show where items should rest is a simple organizational tool.
Maximize the use of floor marking by learning the best practices. Join David Visco, author of 5s Made Easy and founder of the 5S Store, as he shares tips and tricks for using floor tape in support of your 5S initiative. In this webinar, you will learn:
- Where tape falls in the 5S process
- Common applications
- OSHA guidelines
- How to improve safety with floor marking guidelines
- Tips for choosing the right tape and getting it to last
Learn the secrets to sustainable floor marking by joining in this 30-minute webinar. You’ll be glad you did!
Need more help with your floor tape? We got you covered!
Our Floor Marking Best Practice Guide has everything you need, including a downloadable selection matrix to help. Get your copy here:
Meet Your 5S Guide
David Visco is the author of 5S Made Easy and the founder of The 5S Store. Today, he is sharing important tips you can use to ensure that implementing and sustaining 5S is a success in your company.
Learn the secrets to building 5S teams by joining in this 30-minute webinar. You’ll be glad you did!
Transcripts from the Floor Marking Best Practices Webinar
Maribeth:
Now, I’d like to introduce our speaker. David Visco is a 5S expert. Beginning in 1985, David launched his career as a warehouse control manager, running a distribution center that managed inventory of over $500 million in value. As he furthered his career, he gained extensive experience across warehouse, production planning, logistics and materials management. Using 5S in the workplace, he saw a unique opportunity and need for 5S resource.
Maribeth:
And in 2006, he founded The 5S Store, the first online store dedicated entirely to 5S. The 5S Store provides a massive range of 5S products, free best practices content and coaching services to thousands of clients. In 2015, his first book, 5S Made Easy, was published. Today he frequently speaks publicly on the topic of 5S best practices. Take it away, David.
David:
Thanks Maribeth and thanks everybody. I appreciate you coming today. So we’re going to talk about some best practices for market. Yes, we are. Sorry, I’m having a little technical glitch here. Yeah, bear with me one minute. Here we go. Sorry about that. Oh man. All right, let’s see. Just do one other thing. Hey, you got to love technology. All right, so get right to it.
David:
Best practices, so our agenda today is going to be where floor marking falls in the 5S process, common applications, how to improve safety with floor marking, social distancing consideration. Certainly a topic of discussion these days. Tips for choosing the right tape for your environment. Installation tips, some OSHA guidelines, and then we’ll do a Q&A.
David:
All right. So where does floor marking fall within 5S? For the most part, it’s in the set in order phase. So that’s where set everything in place, place for everything, everything in its place. Additionally, and to some extent also it’s part of standardizing and we’ll get to them when we talk about standard colors and whatnot. But for the most part it’s part of setting in order.
David:
So first things first, you need to have color standards. I can tell you as many times, actually I have an example of a client that I went to, they were starting their 5S program. They had a lot of really good things going on and we walked out onto the floor and I see various colors of tape on the floor, marking off pallets or forklifts or whatnot or Kanban, what have you materials. And I asked the gentleman because they were all different colors. I’m like what do these colors mean?
David:
And what he said to me was we just grabbed whatever color we happen to have handy and we throw it down. And I’m like, okay, well that’s really not the right way to do it. The idea is you want to set up… this is part of standardization, right? Set up color guidelines. What I’m showing you here on the screen is an example of what I’ve used over the years. To answer a question that I get a lot though, there’s no one particular 5S color standard out there, but right here this works really well and you can certainly make it your own. This is just one that I’ve used. It’s been pretty successful.
David:
There’s a lot of options today for different floor tape signage and whatnot. There’s heavy duty tapes, there’s thin tapes, and we’ll talk a little further on, on exactly what kind you should use, but there’s so many options that what I suggest doing is getting the 5S team together to figure out which tapes you’re going to use. So standardize your tape, your floor markings, your signage, your footprints, your arrows, whatever it is that you’re going to put on the ground.
David:
Agree to a standard, right? Get people on the production floor involved as well. And like I mentioned in my last webinar, you should have facilities involved, so even if they’re not on your 5S team, I’d strongly suggest that you get facilities input on the tape that you’re going to put on the floor and the signage, because remember the facilities group, they really, they take a lot of pride in the facility that they maintain and getting their input will really go a long way in the future. So it’d be really helpful if you get their input, get their ideas and let them know what you’re doing. And make sure that they agree to the type of floor signage or tape that you’re putting down.
David:
I also strongly suggest setting up a 5S Kanban for your materials. The idea there is, watch here, let me give an example of where this was really needed. There was a client I was at years ago and I said, Hey, we’re all your 5S supplies because I could see them, they had markings and whatever. And they said, Oh well it’s way down the other end of the building in an office that we’re not using locked in a cabinet. And now I was like, well, why is it all the way down there? They need it down here. He said, well, stuff was disappearing and we’d run out of materials. And I said, obviously you realize that you need to have the materials within hands reach or really close by and they shouldn’t be locked up because the whole idea behind lean and 5S is employee and empowerment and involvement.
David:
And if somebody wants to replace a corner marker or some floor tape or whatnot, they need to be able to find exactly where the products are. And they shouldn’t have to go scarring for somebody that might have a key that can unlock the door, that can then unlock a cabinet, that’s just not the way to do it. So what I suggest doing is just setting up a Kanban for your 5S supplies, just Kanban cards. I assume you guys all know what that’s all about and then just keep track of it all. And once you figure out exactly what materials you’re going to have and you have your Kanban set up, set up that material sheet of all the materials, the vendor, who you’re going to use and skews and all that type of thing. Okay.
David:
So I’m going to show you some examples of some applications that we’ve been involved in over the years. This one here was actually done at Kraft Foods quite a while ago actually. It was a distribution center, so it was just pallets in, pallets out. And there were hundreds of thousands of pallets going back and forth all day. And I was sitting there when I first got there and I just observed, right? Because that’s the whole idea to start off sitting, observe, watch what’s going on.
David:
So I was watching what’s going on. I can’t tell you how many times people would come across this massive warehouse floor that had about 25 docks and forklifts going all over the place. And people were just crossing and walking back and forth. Number of times somebody almost got hit. So is a great example here, we just use some floor markings or whatnot, some corner markers or whatever to mark off a safe walkway for folks, worked out really well. Another facility was a solar panel manufacturer in Massachusetts and what we have here is incoming material. So they would get pallets of glass all day long for the top of the solar panels and they had nowhere really good to put it. It was spread all over the place. So I said, set a nice area up here for an incoming area. So everything that would come in here, we just sit until it was time to be inspected.
David:
Floor markings are great for dangerous intersections, right? So I mean this was a little over done, but it’s there more to kind of show you an example. Quite often forklifts and pedestrian or employees are using the same space and they have to use the same aisles. And when that’s the case, that’s great opportunity for somebody to get hurt. So there’s a lot of improvements today, forklifts have lights on them, and I’m going to show you another really cool solution to help against this, but floor markings work really well in this regard. And you can make them as bright or as visual as you want. We could do custom or plenty, hundreds that are in stock. You just got to make it your own, but make sure that it’s clear. We’re going to talk about being clear and concise in a little bit.
David:
These LED Sign Projectors have really come on strong this year. It’s a great solution. You’ve probably seen something like this in airports or at a retail place or whatnot. Great idea behind these is that you can make them turn, so they’re much more visible. So when your employees are coming into a dangerous intersection over time, if it’s just a floor marker on the ground, like an adhesive sign or whatnot, people stop seeing it. They just don’t notice it as much. But with something like this, that thing is bright, it’s shiny, it’s turning and whatnot. And you can make it shutoff as well. But it’s fantastic for really dangerous areas in the warehouse and in the manufacturing floor. And you could get multiple logos and signage in there. So whatever it is you need, you could put in there. The stop seems to be really popular though.
David:
So certainly floor markings used a lot for safety, right? And there’s hundreds of applications out there. These are just a few that we’ve used over the years. The fire extinguisher, I see fire extinguishers a lot in facilities. I’m always looking for that during the tour. In generally speaking, a lot of them are marked properly. So you’ll see a fire extinguisher on the wall and two feet up from it or whatever, you’ll see a little sign that says fire extinguisher. But what I also see often is stuff under the fire extinguisher on the floor.
David:
So blocking access to the fire extinguisher. That’s a no, no as I’m sure you know. So a great solution is these floor signs here, it marks it off really well and then you make sure that nobody’s ever put anything on there. During your audits, if you happen to come along and you see stuff that’s covering this sign and whatever, well obviously you’re going to want to call that out. And actually it doesn’t have to be during an audit. Anybody, any employee, if they see something like that, that’s a non-conformance, that’s a safety issue, they should talk to the people in the group and deal with it and talk it over. These doors swing signs are great. Over the years, run into many doors that open up in front of me and these simple signs really do a nice job.
David:
So social distancing, right? The word of the day these days unfortunately. But 5S is everywhere and this example, I couldn’t believe it. So I went to our local Walgreens. I was with my son, we had to pick up a prescription and we walk in and the image on the left, I’m like, what the, I’m like cool. Like they using 5S and they don’t even know it, you know? And so I was looking at it and I was trying to figure out exactly what they were trying to say because we found this a little bit confusing. I mean, the more I’ve looked at it, I get what they’re trying to get us to do here, but what happened was I stood where the arrow is and a gentleman walked right up behind me in line like we would’ve done months ago. And this was only a few weeks ago.
David:
So social distancing and the whole six foot rule was a big deal by then, I couldn’t believe it. So I turned around, I kind of said to him, could you back up a little bit? And he’s like, Oh yeah, geez, what am I thinking? No harm, no foul. But I was looking at the signage and I’m like, geez, this just doesn’t cut the trick, right? So we took a picture and then we walked out to the register and saw these on the right side, the squares that they had put in place. And it’s all like painters tape, it’s not going to last long. And I didn’t think the overall message here was all that clear. So it got me thinking, and this was before there were a lot of these available, but it got me thinking that we should probably create some floor signage for this.
David:
So what we did was we came up with various solutions for floor marking due to the current situation. The key lesson here though is that they need to be clear and concise. Like I mentioned earlier, if the markings don’t make sense and aren’t obvious, then people are going to break the rules, if you will. They’re not going to understand what you’re trying to get them to do. So as you can see here, we’ve got those six foot signs placed every six feet. It’s very obvious as opposed to the way it was at the pharmacy counter.
David:
It was really kind of confusing. So if you have any social distancing needs within your facility or wherever you’re at, make sure that whatever it is, whatever process you want folks to follow, make sure it’s clear and understandable and get other people’s input too. Don’t just do it on your own, right. It’s always about getting people’s input. So yeah, just some ideas there. On that note, next month we’re going to be talking a lot about social distancing solutions and ideas because a lot is coming out in this topic. So join us then in several weeks, it’ll be great.
David:
Okay, getting tape to stick. Well, I got to say if there’s one thing that I get asked about more than anything else, even more than how to sustain 5S, it’s how do I get my tape to stick. So what I found over the years is certainly it’s a common problem, but what happens is folks are unclear as to which product is best for their facility and their floors and how to install it right. It happens all the time where we’ll talk to somebody about what it is that they’ve used. I’m like, well, here’s why that wasn’t the right fit. So this tip here will really be helpful for you.
David:
The first step is to choose the right tape. All right, so we have a download of a tape selection matrix, it’s on the next slide. I’m going to show it to you here and then I’ll go back to this screen. You can download this here. But basically what this shows you is of the five different types of tape we have, what colors are available. So we have vinyl, floor mark, dura stripe supreme, viz mark and tough mark. And I got to tell ya, I should have said this earlier, there’s tons of different tapes out there. I have tried them all, I really have. There isn’t a single one that I’m aware of that I haven’t tested. In these here, we found to have been the best. There’s some others out there that work well too but these we’ve had a lot of success with.
David:
So the way it goes is you have these different types of tape here and then you have to choose your floor type, right? So your floor is smooth, are they porous? Maybe they were pot seed, they might be laminated or maybe even a wood. Some of the older mills or whatever are made of wood. So what you do is you figure out exactly which type of floor you have and then use the floor tape matrix and then figure out what features that you want on your tape. Doesn’t need to be heavy duty because sometimes like in a lab or something, you don’t need heavy duty tape. That’s a waste of money. So you can use no vinyl tape or floor mark, doesn’t need to be easy to remove, et cetera. I’ll tell you one thing, if you’ve ever tried removing vinyl tape, you know how painful it is.
David:
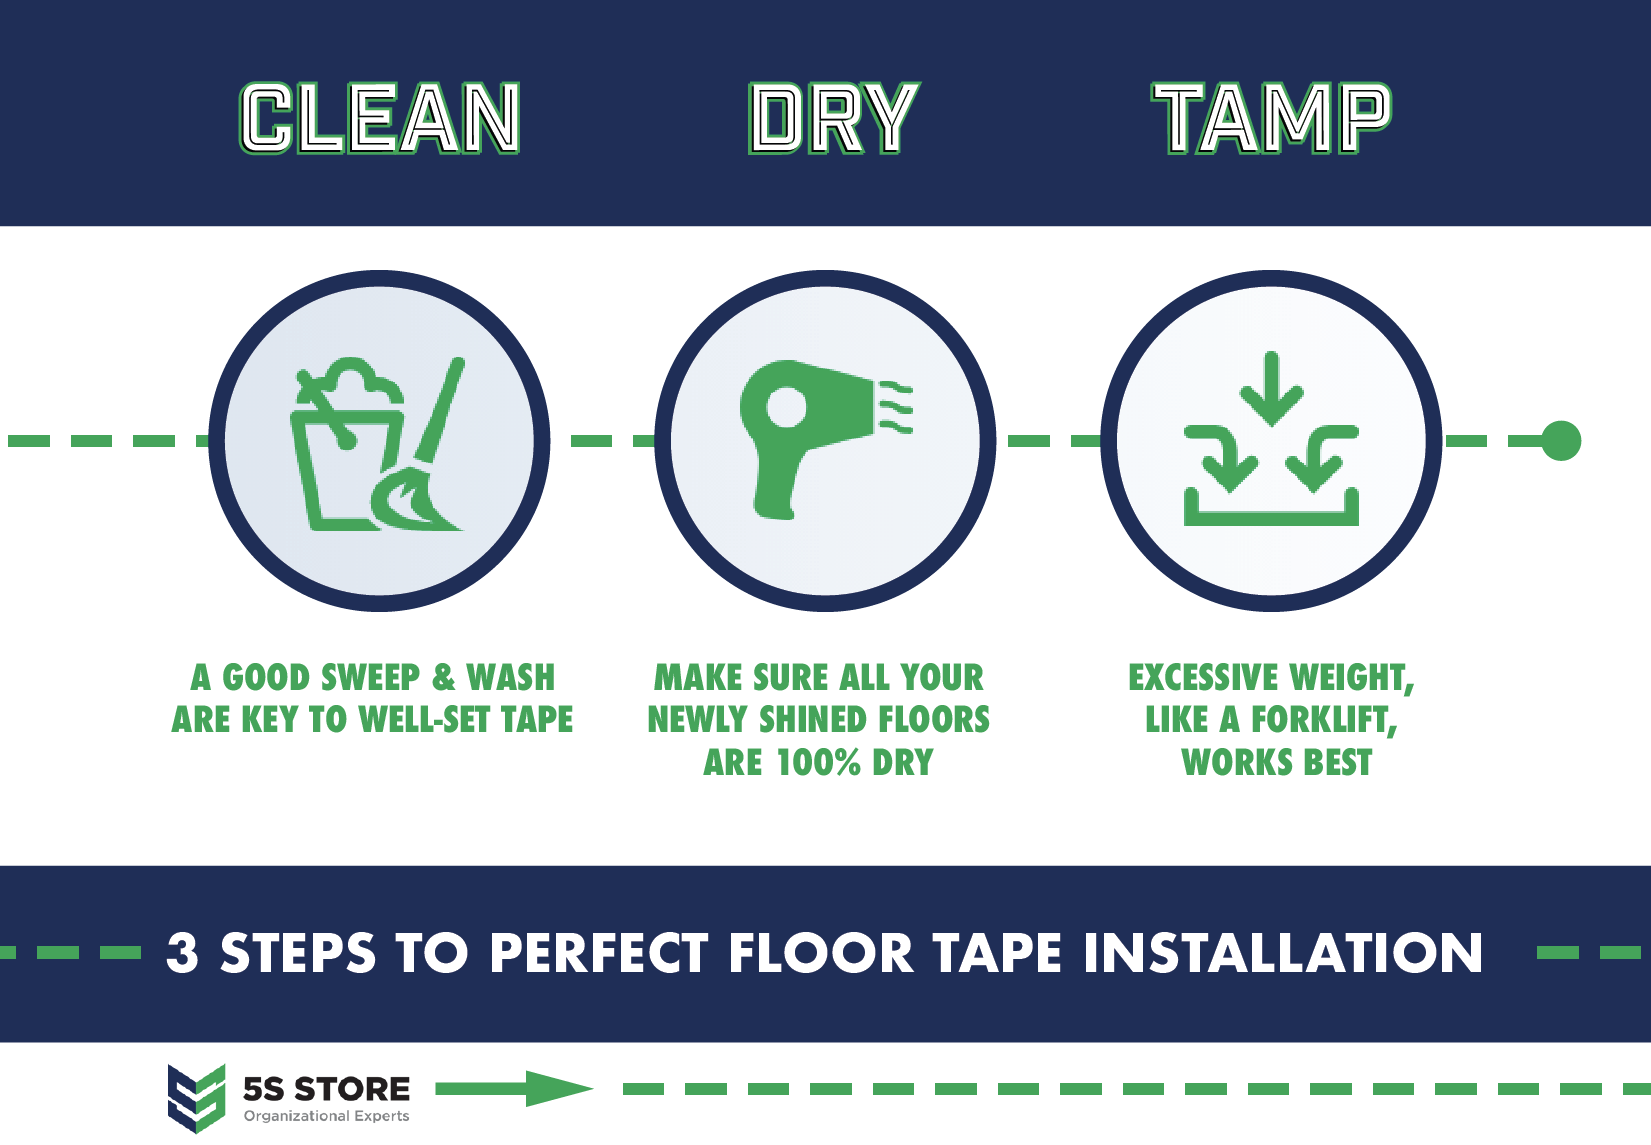
Most of these heavy duty tapes are easy to remove. So, assuming you’ve chosen the right tape, the next step is installing it right. So you need to clean the floor of course. And you can use any cleaner. It doesn’t have… there’s no special cleaner to use out there. We do carry a cleaner, but it’s like any other cleaner. You’re going to dry the floor, you have to dry it really well, not just kind of, okay, you want to dry at least an hour or so let’s say. And then the key that everybody misses on tape installation is the laying it down. So what a lot of folks do, even on the heavy duty tapes is they take the tape, they lay it down, they maybe they’ll get on the hands and knees, press in in with their hands and their palms.
David:
And then they might step on it a little. Well, the problem with that is the heavy duty tapes are pressure sensitive. So what’s that mean? What that means is they have this pressure sensitive adhesive that needs to be tamped or pressed into the floor. If you don’t do that, you won’t get the best results. And I find a lot of times that’s what people do or aren’t doing. So when I say tamp the tape, what I mean is if you have like a landscape roller or the rare wheel of a forklift, you need to drive over the tape or tamp the tape in the same direction that was laid down and you’ll get the best result there. That’s the best thing that you could do to lay tape. You follow these very simple instructions. You choose the right tape and then you install it properly, nine times out of 10 you’re going to get a much better result.
David:
Okay, OSHA, so OSHA surprisingly doesn’t have floor marking guidelines. I did a lot of research on that and I always thought they did, but I actually found that they don’t. And I reached out to a number of folks that I know to. They do however, require accessibility for electric panels. And this is another place where floor marking can come really come in handy, like the picture you see there. What I see often is electric panels are buried. There’s all sorts of stuff hiding them and that debt is an OSHA violation right there. So you certainly want to make sure that you’re using whatever tape standard you used, like we talked about in the beginning, in the proper type of tape like we just talked about. But you want to mark off the electric panels with the three feet clearance and at least two and a half feet wide. Okay, so make sure you’re doing that on all of your electric panels. All right, so with that we will take questions.
Maribeth:
All right, David, we’ve had a few questions come in here. The first one inquires about the frequency for replacing floor tape. How often should it be replaced?
David:
Oh, that’s a good question. Well, it really depends on your standard and what’s going on. So I’ll be in some places and within a month or so the tapes already dirty, but what’s your goal? Are you trying to, the floor marking is supposed to be to give some type of visual cue or whatnot. If it’s still holding up and it still is doing its trick, that’s fine. You don’t have to replace it yet. And if it does get dirty, most of the heavy duty tapes can actually be mopped and cleaned pretty well.
David:
But where you need to replace it is if it’s being torn up. So if you don’t still have a nice full line, you want to get it replaced. If it’s torn, you want to get it replaced. What I suggest to folks is if there ain’t a lot of lines of tape to like mark off pallet locations and whatnot. It’s a good idea to just use corner markers because you just have four corners and then you can line up pallets with T markers and X markers and you have a lot less material on the ground and it’ll last a lot longer. And if one corner should happen to dig up, you just replace it nice and easy. So I think that’ll work for you.
Maribeth:
Thanks David. We’ve had a couple people submit the same question and we’re getting asked about tape removal. So what are the best ways to remove tape, particularly vinyl tape?
David:
Oh, that’s the one. The vinyl tape. Oh man. Yeah, vinyl is as painful as it can be. I’ll tell you a really funny story. I was at a client and we were laying down all sorts of heavy duty tape, but they had old remnants of vinyl tape and they’d got the floor scrape, but the heavy duty floor scraper that we have, and I’d use it in the past and it was fantastic. Well, we got to work on the thing and we were trying to scrape up the vinyl tape. And what we didn’t realize, and I had forgotten because it wasn’t working so I was really embarrassed of course, is that when the scraper ships it ships with the blade upside down. So we were trying to remove the tape with a dull edge. And I was like, Oh what an idiot.
David:
So here’s the beautiful thing, I realized my stupidity and I took the blade and I flipped it around and that tape came up like that. It was incredible. It just worked so well. So I know that if you try and pull it up with your hand, it’s splinters and stuff and it’s just so painful. But we find the floor scrapers work incredibly well. If you go to the heavy duty tapes, they will pull up in pieces, those won’t splinter the way vinyl tape will. And the floor scraper works really well with that too. But you only need, usually with the heavy duty tapes, you only need a little nudge, so if you don’t have a scraper handy, if you get under just one piece, those are usually come up in nice full long pieces.
Maribeth:
The next question also asked by a couple of different people is regarding recommendations on getting good straight lines.
David:
Good question. Wow, these questions are awesome. What I like to do is snap a chalk line. It’s really that simple. So snap a chalk line, lay the tape down and there’s different types of tapes out there, right? So the vinyl tape is taped on itself and it’s made out of petroleum so it’s very rubbery, very hard to get a nice straight line with the vinyl tapes because of the material. If you use the floor mark or any of the heavy duty tapes like the dura stripe supreme that we have there that have a backing to them, you’re going to snap your line and then you’re only going to lay it down in like two foot pieces at a time. You’re not cutting it at two feet, but what I’m saying is you remove about two feet of the backing, lay that tape down on the the the chalk line. Then pull the backing back, weigh it down again, two feet worth and just keep doing it like that and you should be in really great shape.
Maribeth:
Great. The next question is about adhesive floor signs. How long should folks expect those to last without needing replacement?
David:
Good question. So it depends on where they’re being put. If it’s a trashcan floor sign, which is our most popular floor sign, that more than likely is going to last for a very long time, like beyond a year easily because there’s nothing going over it. What you might be referring to is signs that say like a caution forklift. Meaning forklifts are probably going all over the place. Well, this brings up one of the biggest challenges for floor markings in warehouses and manufacturing. I’m a warehouse guy, that’s where all my experience had been before I open the 5S Store with my wife.
David:
And what we find in the warehouse is warehouse workers will typically drag pallets and that’s a problem. By OSHA regulations, they’re supposed to pick the forks up a bit. Dragging pallets is what kills your floor signs. If people aren’t dragging pallets and they’re just rolling over them, driving over them with the forklifts, they should easily last four, six, eight, 12 months easily. What happens sometimes is the floor signs are positioned where forklifts are turning. So you got the whole wheel of the rear wheel of the forklift turning on the sign. I would try and avoid placing them in those spots where there’s turning and pivoting going on. But if they’re not dragging pallets, there’s no reason at all why if you install them like I mentioned earlier, because it’s the same for the signs as it is the tape that they should last you quite awhile beyond six months easily.
Maribeth:
Great. And our final question is a two-parter about the topic of social distancing. So the first part of the question says do boxes work better than signs for social distancing? And the second part is, could we get the same box effects placing corner markers six feet apart?
David:
So this is all new, right? So I would say would boxes be just as effective? I think that like what I’ll do often in a warehouse is we use corner… If we need a big box used four corner markers and maybe a dot in between each of them. So you’d have four dots and you would have four corner markers and there’s no reason why you can’t. You’re forming six feet that way, you don’t need the full lines necessarily. So I don’t think you need a full box. Really don’t.
David:
And would a box be better than just a sign? I kind of think that’s a good idea because you’re putting even more visuals down. Of course, we also have the strip of a sign, which just says keep six feet, but maybe you could even use them both and really go overboard. But in today’s world maybe that’s actually necessary. I didn’t even think about that. So thank you. You could use both. You can make a box out of the corners and maybe a few dots and put one of those floor signs down with actual wording on them and then you’re really hitting a home run.
Maribeth:
And that’s our final question today, David.
David:
All right, great. Well look, I appreciate everybody coming today. This was fun.
Additional Resources:
Floor Marking Tape Guide: Your Ultimate Tool for 5S Tape Success
Warehouse Floor Marking: Why it’s Necessary for Every Phase of 5S
LED Floor Sign Projector – SafeWork Insider
Just for fun:
The #csrulebreaker is at it again. This time he’s ignoring hazard floor tape. He’s having fun, but not for long…
